Key Elements of a Professional Finished Basement Design
Finished basement design is one of the smartest investments a homeowner can make. It turns unused square footage into livable, valuable space — often for 50–75% less than building an addition.
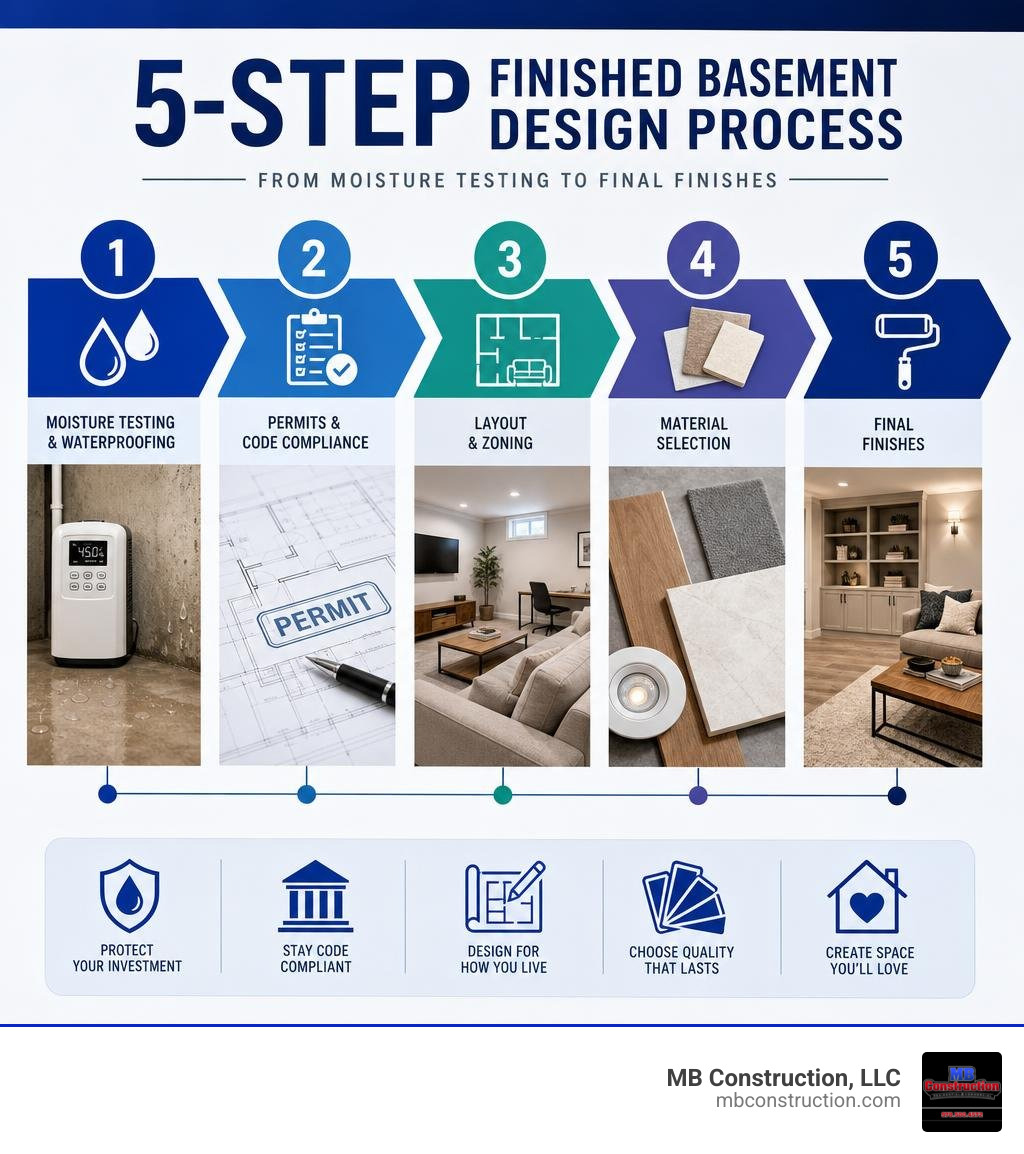
Here is a quick overview of what a successful basement finishing project involves:
- Moisture testing and waterproofing — always the first step before any cosmetic work
- Permits and code compliance — required in Massachusetts for framing, electrical, plumbing, and bedroom additions
- Layout and zoning — defining areas for entertainment, work, fitness, or guests
- Material selection — moisture-resistant flooring, lighting, and ceiling treatments
- Professional design planning — permit-ready drawings that guide contractors and inspections
- Budgeting — average costs based on internet data show basic finishes starting around $15/sq ft, while premium custom builds can reach $150+/sq ft
A finished basement typically returns around 70 cents on every dollar invested at resale. In high-demand markets like Greater Boston and Middlesex County, that return can be even stronger.
But here is the honest truth: most basement projects go sideways not because of the finishes chosen, but because of what was skipped at the start — moisture problems, missing permits, or a layout that was never properly planned.
This guide walks through every phase of the process, from the first moisture test to the final design trend worth considering in 2026. Whether you are in Andover, Burlington, Chelmsford, or anywhere across suburban Massachusetts, the fundamentals are the same.
Finished basement design vocab explained:
Pre-Construction Requirements for Basement Finishing
Before you select paint colors or look at theater seating, you must address the physical realities of your below-grade space. Skipping these diagnostic steps is the most common reason basement renovations fail. Concrete is inherently porous; it constantly absorbs and transmits moisture vapor from the surrounding Massachusetts soil, even when it feels bone-dry to the touch.
Before framing begins, we highly recommend conducting a comprehensive structural and environmental audit. This includes inspecting the foundation for cracks, checking the grading around your home’s exterior, and ensuring your gutters drain far away from the foundation wall.
In some older homes throughout Middlesex County, low ceiling heights can make a basement feel cramped. If you need more headroom, options like lowering the concrete floor or converting a crawl space are highly effective. You can learn more about how we handle these structural earthworks on our Excavation Services page, and explore the structural considerations of building downward in our detailed guide, The Lowdown on Building Down When You Build Out.
Moisture Mitigation and Waterproofing
Moisture is the single greatest threat to a finished basement design. To determine if your space is ready for framing, perform a simple plastic sheeting test. Tape a two-foot square of clear plastic wrap tightly to your concrete floor and foundation walls, sealing all edges with duct tape. Leave it for 48 to 72 hours. If condensation forms on the underside of the plastic, moisture is migrating through the concrete from the outside. If condensation forms on the top, your basement has high interior humidity that must be controlled with a dedicated dehumidifier.
Addressing moisture issues requires a systematic approach:
- Exterior Waterproofing: Based on internet data, the average cost for exterior waterproofing is approximately $10,000, with projects ranging from $3,000 to over $100,000 depending on your home’s perimeter, excavation needs, and depth.
- Interior Drainage Systems: Based on internet data, the average cost for interior drainage is around $5,000, with a wide range from $1,500 to $50,000. This involves cutting a trench around the interior perimeter of the basement floor, installing a perforated drain pipe, and routing it to a sump pump system.
- Sump Pumps: Always install a high-quality primary sump pump with a battery-backup system. Power outages during heavy spring rains in New England are common, and a backup system ensures your finished investment remains dry.
- Vapor Barriers: Before framing, install a continuous 20-mil polyethylene vapor barrier on the concrete walls, or use rigid foam insulation boards sealed at the seams to prevent warm, humid interior air from contacting cold concrete.
For a deeper dive into preparing your space and managing these early structural phases, refer to this Basement Finishing Guide.
Code Compliance and Egress Windows
Building codes exist to keep your family safe. When finishing a basement, compliance with the International Residential Code (IRC) and local Massachusetts building regulations is non-negotiable.
The most critical safety requirement is emergency egress. If you plan to include any room designated as a bedroom, or if you are creating a habitable living space, you must have an egress window or door that leads directly outside.
- Egress Window Dimensions: To meet IRC standards, an egress window must have a minimum net clear opening of 5.7 square feet. The minimum opening height must be 24 inches, the minimum width must be 20 inches, and the bottom of the clear opening (sill height) must not be more than 44 inches above the finished floor.
- Egress Wells: If the window is below ground level, it must feature an adjacent window well with a horizontal area of at least 9 square feet, extending at least 36 inches out from the window. If the well is deeper than 44 inches, it must feature a permanently affixed ladder or steps.
- The Design Upside: Egress windows do not have to look like dark, industrial pits. By using reflective well liners, tiered landscaping, and light wells, you can turn a safety requirement into a beautiful feature that floods a dark basement corner with natural light.
For homes with shallow foundations or crawl spaces that need to be deepened to meet the minimum ceiling height codes (typically 7 feet of clear headroom), excavating is a viable path forward. Read about the structural details of this process in Digging into the Costs and Benefits of Crawl Space Excavation.
Basement Layout Planning and Multi-Zone Design
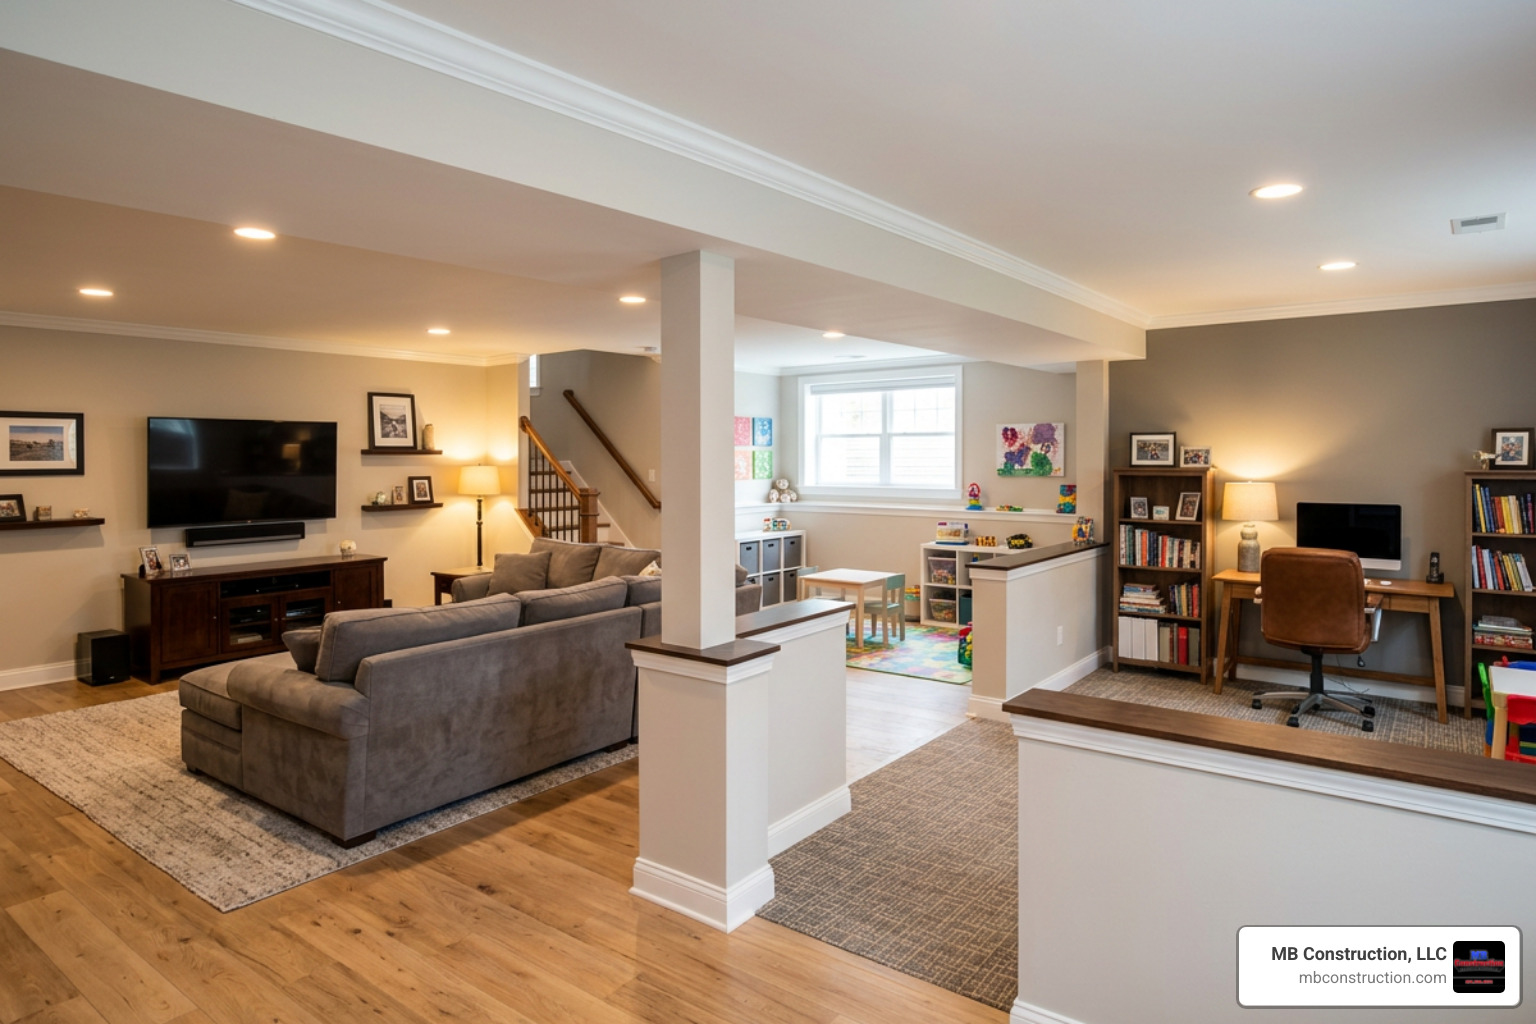
An outstanding finished basement design feels like a natural, intentional continuation of your home’s upper levels rather than an isolated underground bunker. Achieving this requires moving away from the old-school approach of building one massive, open room. Instead, we use CAD software to design smart, multi-zone layouts that accommodate different activities simultaneously without feeling fragmented.
When planning your layout, you must work around existing structural obstacles. Support posts, main sewer lines, and low-hanging ductwork are standard basement features. Rather than simply boxing these elements in with drywall—which often results in awkward, claustrophobic soffits—look for creative architectural integrations. Support posts can be wrapped and transformed into elegant columns, integrated into custom archways, or built into half-walls that separate functional zones.
If you are thinking about how a basement remodel fits into your broader home improvement goals, read The Complete Guide to Whole House Renovations.
Designing a Finished Basement Design for Entertainment and Work
Creating a multi-zone layout requires balancing high-energy entertainment areas with quiet, focused work zones.
- The Home Theater Zone: Position your media center or home theater in the darkest area of the basement where natural light is minimal, reducing screen glare. For an optimal viewing experience, plan your seating distance based on your screen size (for example, a 75-inch television screen typically requires a viewing distance of 7 to 11 feet).
- The Acoustic Home Office: Working from home requires acoustic isolation, especially if the kids are watching movies nearby. Frame your office walls using sound-dampening insulation (such as mineral wool batts) and install a solid-core door with weather stripping along the frame to block airborne sound. Running dedicated Ethernet lines during the framing stage ensures a stable connection.
- The Wet Bar and Social Hub: A wet bar transforms a basement into a self-contained destination. Plan for a small sink, an undercounter beverage fridge, and durable countertops. Grouping the wet bar near the home theater or game zone keeps snacks and drinks close to the action.
Integrating Gyms and Guest Suites
If your basement layout includes fitness space or guest accommodations, proper planning prevents future headaches.
- The High-Performance Home Gym: Avoid standard flooring in workout zones. Instead, design a dedicated gym area featuring heavy-duty, interlocking rubber tiles (at least 3/4-inch thick) to absorb the impact of dropped weights and protect the subfloor. Ensure you have adequate ventilation and ceiling height for upright equipment like treadmills or ellipticals.
- The Welcoming Guest Suite: A basement guest bedroom must feature an egress window to be legally compliant. Situate the guest room adjacent to a full bathroom to provide maximum privacy.
- The Dedicated Bathroom: Adding a bathroom below grade requires careful plumbing integration. If your main sewer line is high up on the wall, you may need an upflush (macerating) toilet system or a sewage ejector pump basin installed beneath the concrete slab.
To see how we design and execute high-use rooms like custom guest bathrooms, kitchenettes, and living spaces, check out our guide on Stunning Renovations for Your Most Used Rooms.
Material Selection for Finished Basements
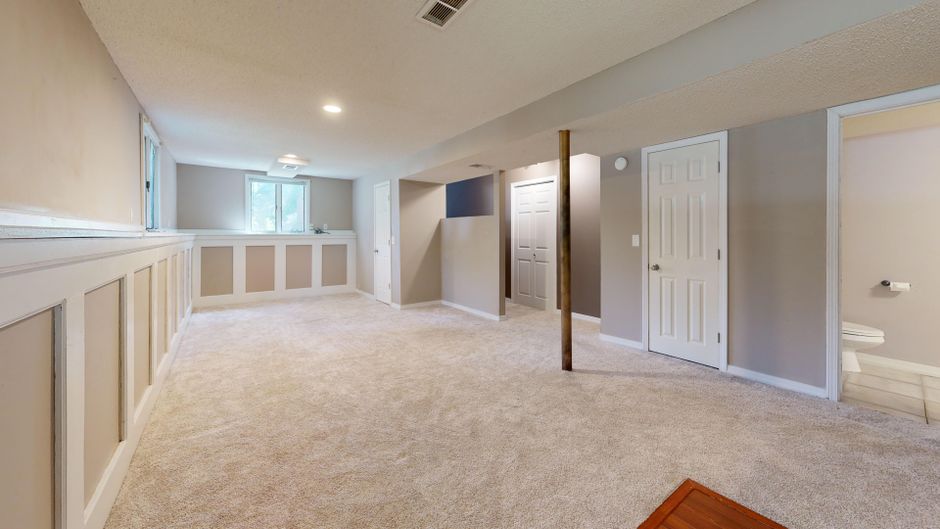
Material selection is where your finished basement design truly comes to life. Because basements are subject to higher humidity levels and temperature fluctuations than above-grade spaces, the materials you choose must work harder and resist moisture while delivering high-end style.
Flooring and Ceiling Options for a Finished Basement Design
Selecting the right flooring and ceiling treatments can make or break the comfort and durability of your lower level.
- Luxury Vinyl Plank (LVP): This is the absolute champion of basement flooring. LVP with a rigid stone plastic composite (SPC) or wood plastic composite (WPC) core is 100% waterproof, highly durable, and virtually indistinguishable from real hardwood. It is installed as a floating floor, allowing the concrete subfloor underneath to breathe.
- Carpet Tiles and Low-Pile Carpet: If you want the warmth and acoustic benefits of carpet in your home theater or guest bedroom, select a low-pile, synthetic carpet (like nylon or polyester) paired with a synthetic, antimicrobial carpet pad. Avoid thick wool carpets, which trap moisture and harbor mold. Carpet tiles are an excellent budget-friendly alternative because if one area experiences a spill or minor moisture issue, you can easily replace individual tiles.
- Exposed, Painted Ceilings: If your basement has low clearances (under 7.5 feet), a traditional drywall ceiling can make the space feel restrictive. Instead, consider spraying the exposed floor joists, ductwork, and pipes in a uniform matte black, deep charcoal, or warm off-white. This industrial-chic approach preserves every inch of headroom, provides easy access to mechanical systems, and costs significantly less than drywalling.
- Drywall Ceilings: For a polished, traditional look, drywall is the standard. To elevate the design, incorporate varied ceiling heights or tray ceilings to mask main duct lines while keeping the rest of the ceiling as high as possible.
Project Budgeting and Cost Breakdown
When planning your budget, it is important to understand that costs vary widely based on the size of your space, the existing condition of your foundation, and the luxury level of your finishes. Based on internet data, the average basement finishing project costs around $35,000. However, because every home is unique, actual project costs span a wide range—starting from basic cosmetic upgrades at $12,000 to premium, high-end luxury transformations that can exceed $350,000+.
To help you plan, we have broken down these average costs based on internet data into three distinct budget tiers:
| Feature / Tier | Basic Finish (approx. $15–$30/sq ft) | Mid-Range Finish (approx. $30–$50/sq ft) | Premium / Luxury Finish (approx. $50–$350+/sq ft) |
|---|---|---|---|
| Primary Layout | Large, open-concept recreation room | Defined zones (family room, home office) | Multi-room layout (theater, gym, guest suite) |
| Moisture Control | Basic vapor barrier and sealant | Interior drainage system & sump pump | Comprehensive interior/exterior waterproofing |
| Flooring | Sealed concrete, carpet tiles, or basic LVP | Premium LVP or high-quality carpet with pad | Heated LVP floors, luxury tile, or gym rubber |
| Ceiling | Exposed painted joists or drop ceiling | Flat drywall ceiling with basic soffits | Custom tray ceilings, architectural wood slats |
| Lighting | Standard surface mounts or basic recessed | Grid of recessed LEDs with dimmer switches | Layered smart lighting, LED strips, wall sconces |
| Plumbing | None | Half-bath or simple wet bar | Full spa-style bathroom, custom wet bar/kitchenette |
| Average Cost Range | $12,000 – $24,000 | $24,000 – $40,000 | $40,000 – $350,000+ |
Investing in your basement is a highly cost-effective way to expand your home’s footprint. To compare the costs of finishing your basement versus building an entirely new home addition, explore our Cost Addition Basement Complete Guide.
Modern Basement Design Trends
Basement design has evolved rapidly. Homeowners are no longer satisfied with dimly lit “man caves” or sterile, white-walled playrooms. In 2026, the trend is toward creating highly intentional, atmospheric spaces that serve as a true retreat.
- Moody, Color-Drenched Lounges: Instead of trying to make a dark basement look bright by painting it bright white—which can often end up looking cold and gray—designers are leaning into the shadows. Color drenching (painting the walls, trim, and ceiling the exact same rich, dark color, like deep forest green or charcoal gray) creates an incredibly cozy, high-end speakeasy vibe.
- Acoustic Wood Slat Panels: Incorporating vertical wood slat panels on accent walls is a massive trend. Not only do these panels add beautiful texture and a modern, organic warmth to the space, but they also significantly improve the room’s acoustics by absorbing sound bounce.
- Home Wellness and Saunas: The home gym trend has expanded into full-scale wellness zones. Homeowners are pairing workout spaces with infrared saunas, cold plunge tubs, and dedicated yoga or meditation corners.
To see what leading designers recommend for modern layouts, lighting, and finishes this year, check out these Basement Design Ideas.
Frequently Asked Questions
Do I need a permit to finish my basement in Massachusetts?
Yes, you absolutely need a building permit to finish your basement in Massachusetts. Whether you live in Billerica, Andover, or Chelmsford, local municipal building departments require permits for framing, electrical work, plumbing, and mechanical modifications.
Failing to pull permits can result in costly fines, force you to tear down completed work for inspections, and create major complications when you eventually try to sell your home. Working with a licensed and insured general contractor ensures your project is fully permitted and complies with all local building codes.
How can I make my basement feel like a natural extension of my home?
To make your basement feel like an upper level, use consistent finishes. Carry the same flooring, interior door styles, trim profiles, and paint color palettes down from your main living areas.
Pay close attention to the transition point: installing a high-quality stair runner (such as a bold pattern or classic wool plaid) signals that the lower level is an elevated, intentional space. Finally, avoid relying solely on overhead recessed lights. Layer your lighting with wall sconces, floor lamps, and LED accent lighting to create warmth and eliminate dark corners.
What is the most cost-effective way to design a basement?
The most cost-effective way to design a basement is to invest heavily in the planning phase before buying any materials. Working with a professional designer to create detailed CAD plans ensures that every wall, outlet, and plumbing line is placed correctly, avoiding costly mid-construction changes.
If you are working with a tight budget, focus your funds on structural necessities—like waterproofing, quality insulation, and safety egress—and save on cosmetics by choosing exposed painted ceilings, modular carpet tiles, and open-shelf cabinetry.
Conclusion
Planning a finished basement design does not have to be an overwhelming process. By taking a methodical approach—addressing moisture first, securing proper permits, planning a functional multi-zone layout, and selecting durable, moisture-resistant materials—you can unlock your home’s hidden potential and create a space your family will love for years to come.
At MB Construction, LLC, we bring decades of hands-on expertise to every remodeling project. Based in Billerica, MA, we proudly serve homeowners throughout Middlesex County and the Greater Boston area, including Andover, Burlington, Chelmsford, and beyond. We are committed to delivering quality-driven, time-sensitive renovations using premium materials and expert craftsmen, backed by our guaranteed workmanship.
If you are ready to stop walking past your basement door and feeling the weight of wasted potential, we would love to help you bring your vision to life. Explore our comprehensive Remodeling Services and contact us today to discuss your project!